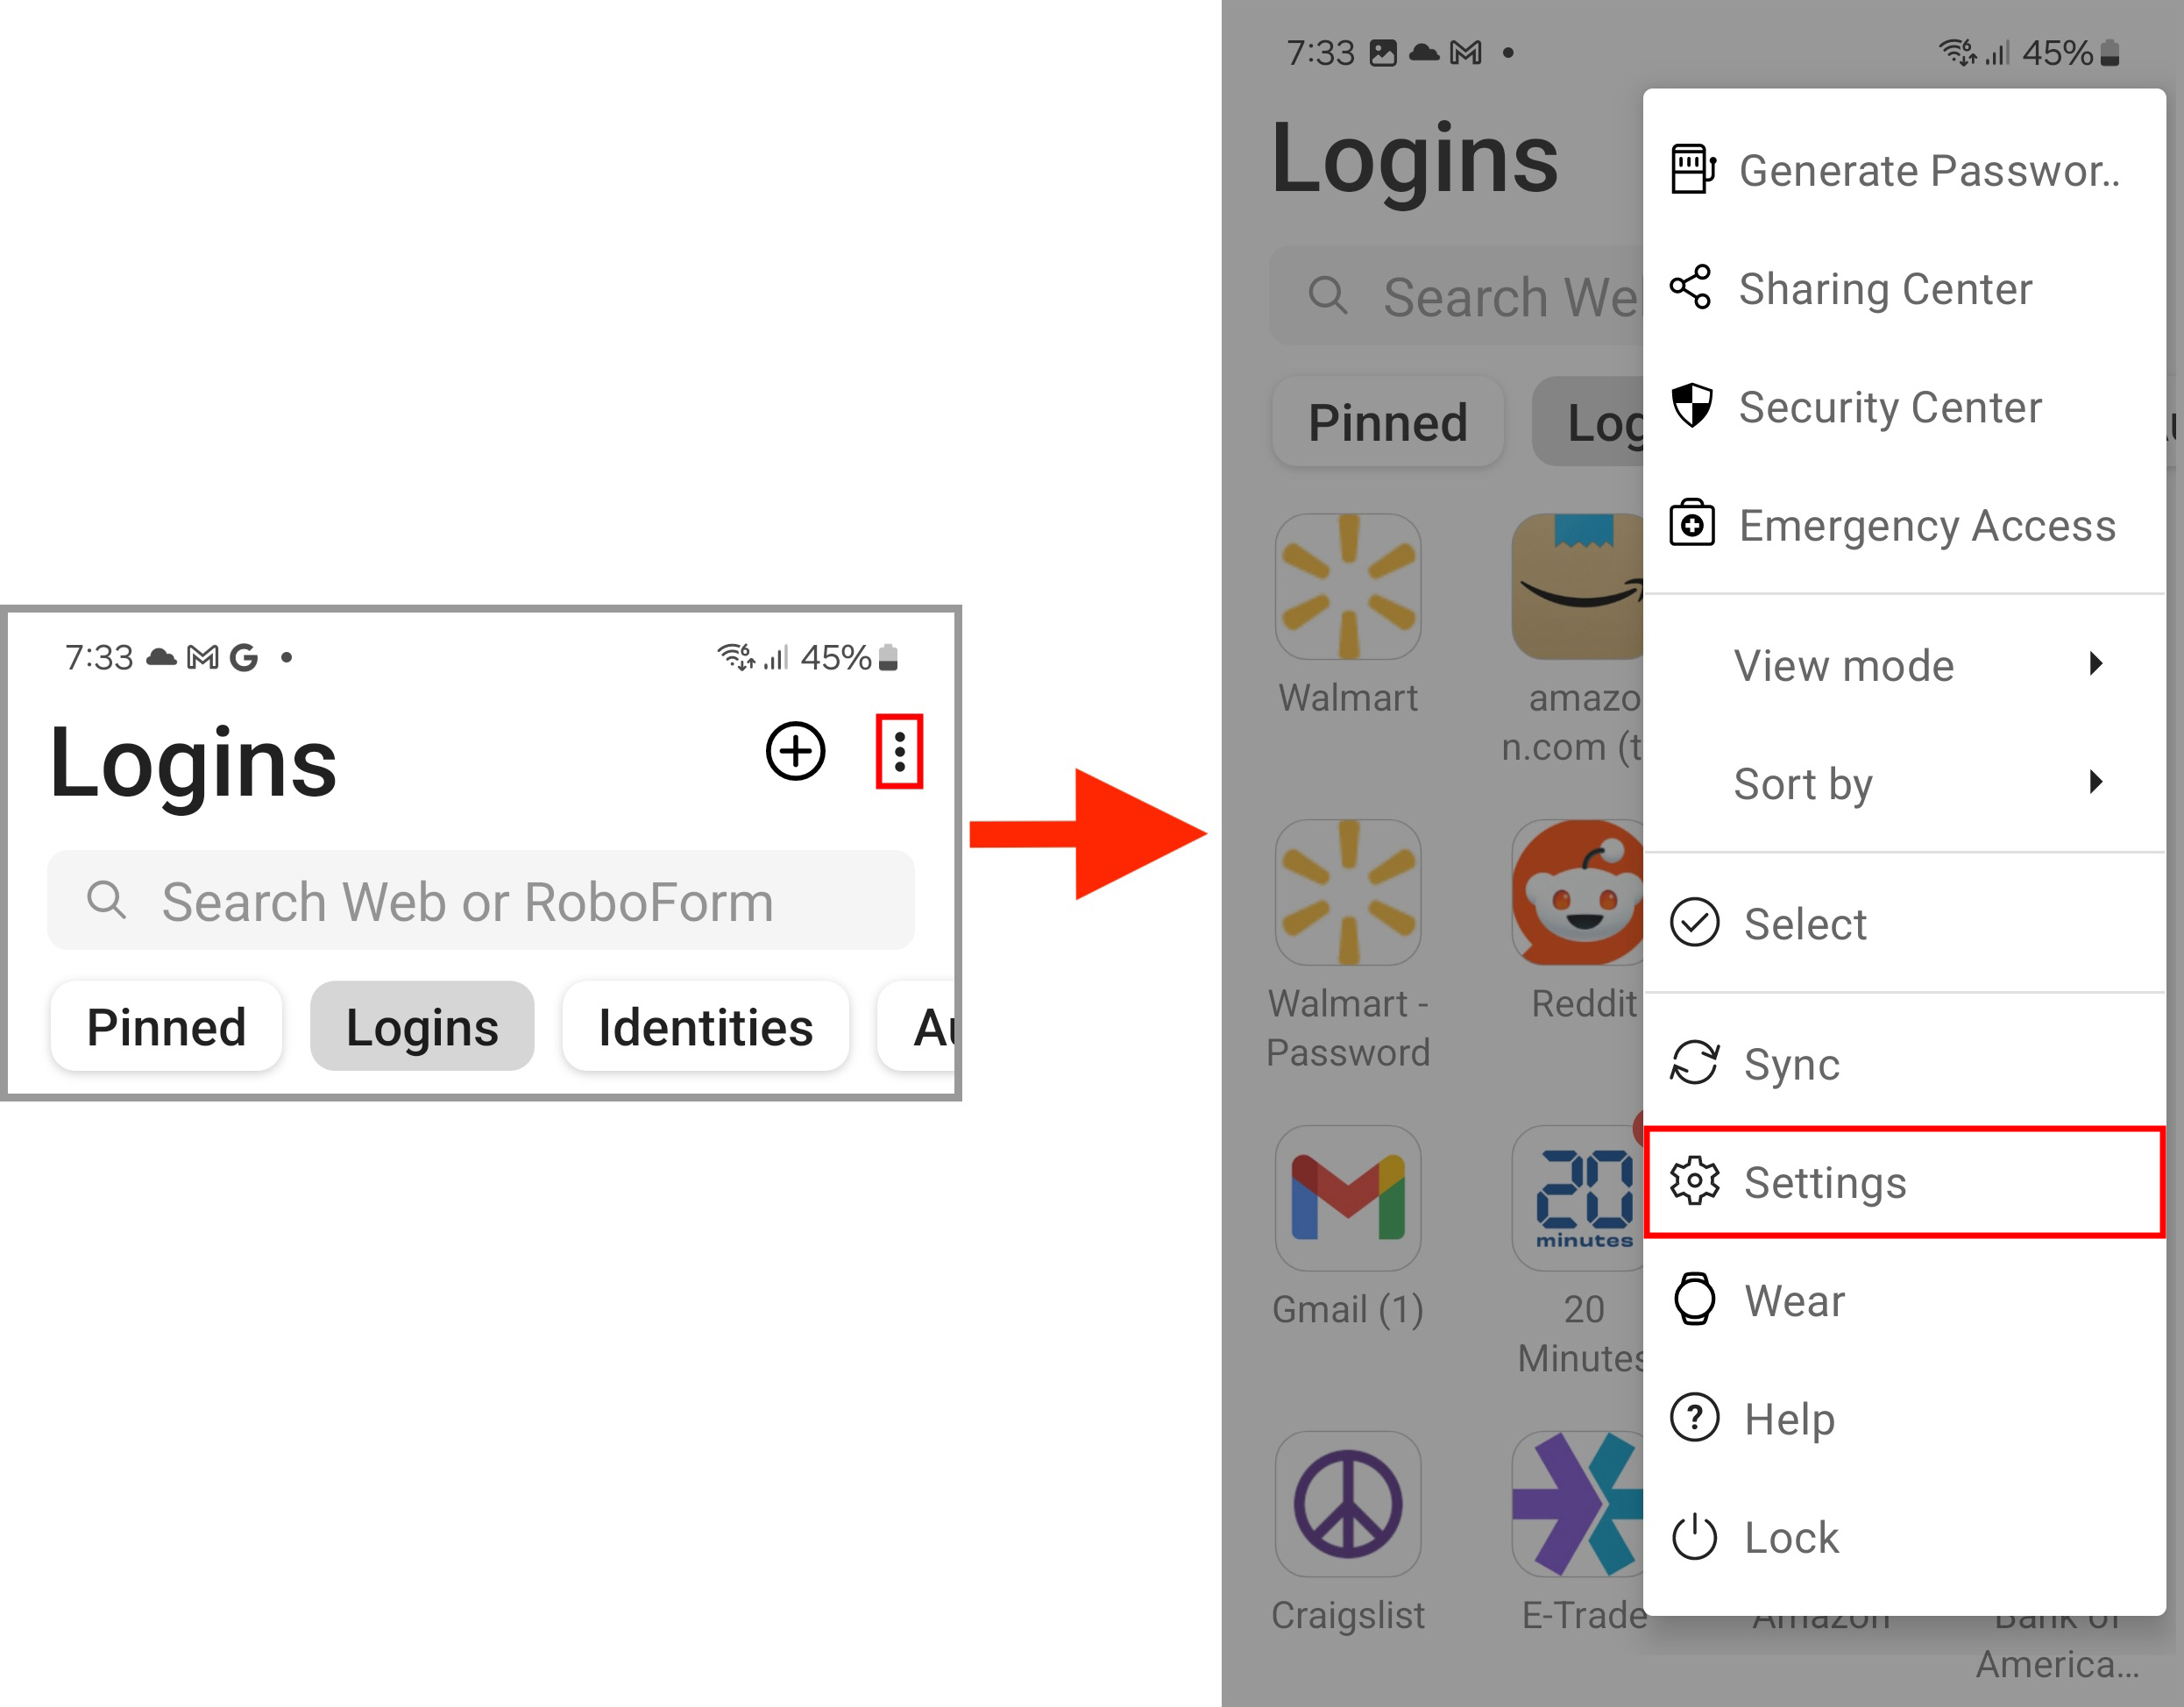
1) Open the RoboForm app and tap the 3 dots in the upper right corner. Then, select "Settings" from the menu.
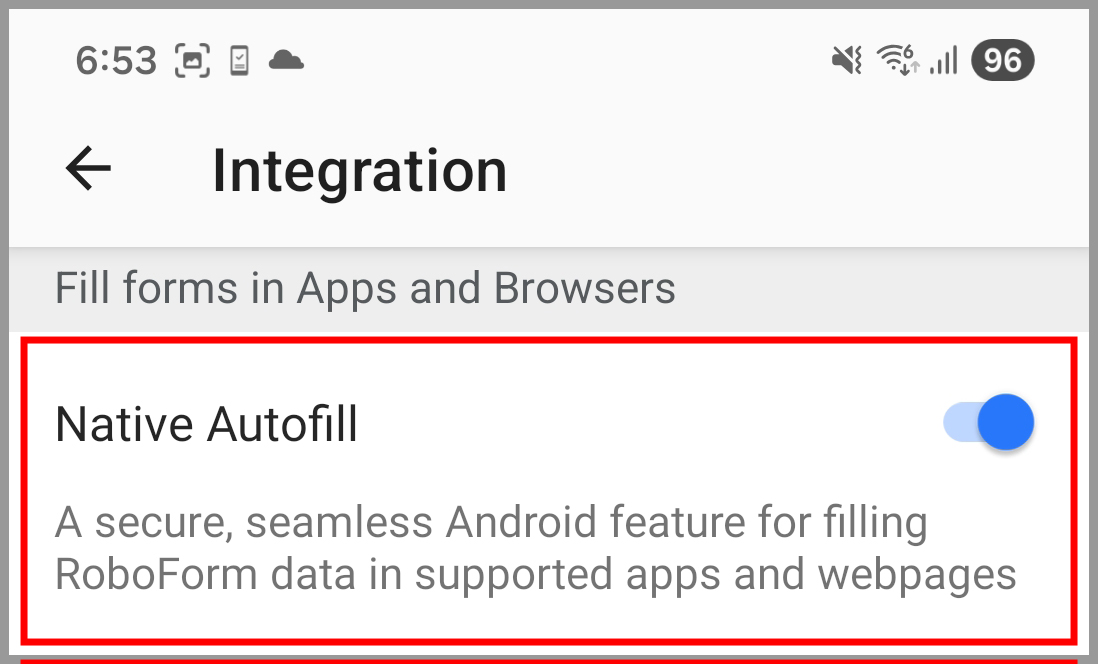
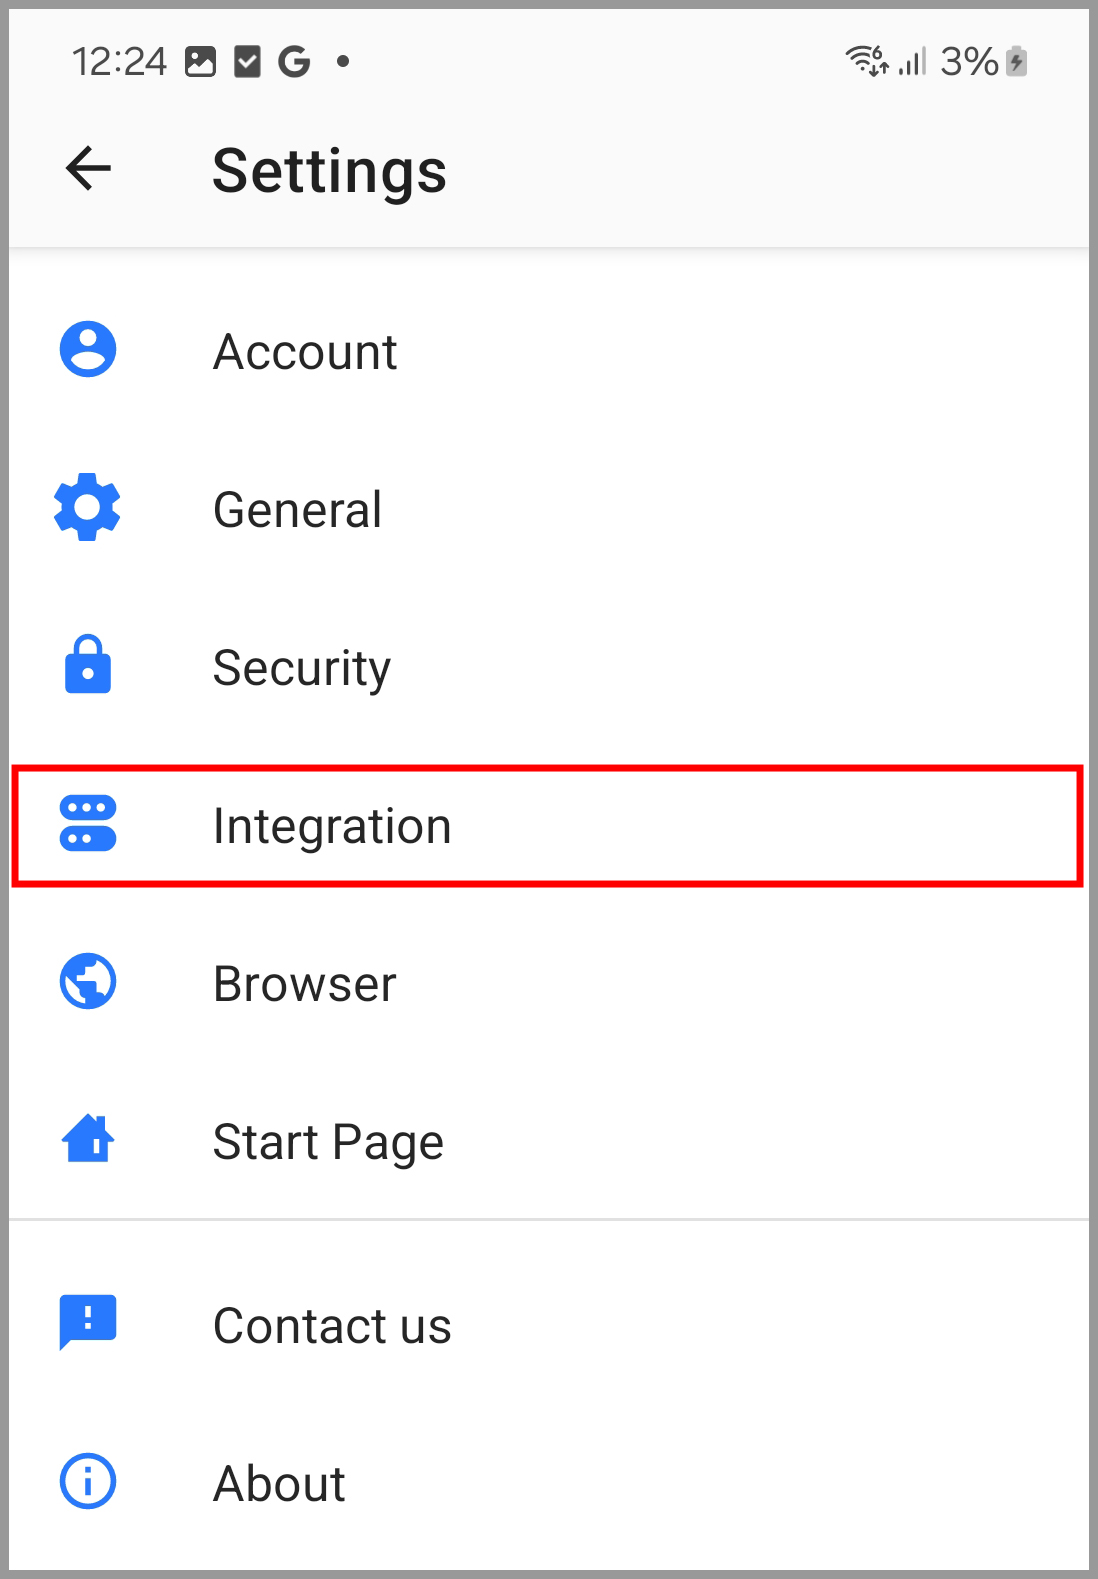
2) Select "Integration" from the Settings menu.

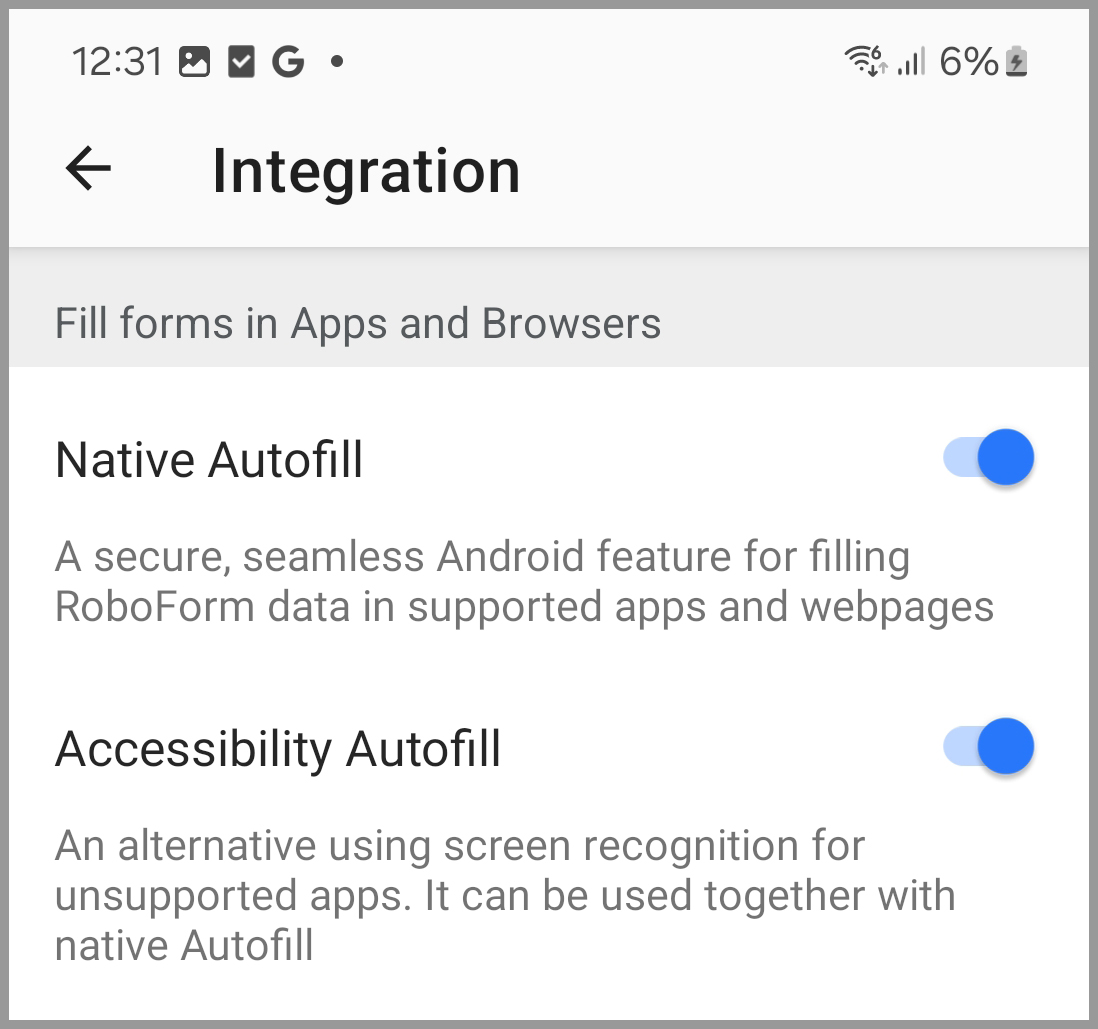
3) Tap the "Native Autofill" option to turn it ON (blue).
4) You will be brought to the Android Auto-fill service page. Tap the toggle to the right of "Google" to turn it OFF (grey). Then, tap the toggle the right of the "RoboForm" option to turn it ON (blue).

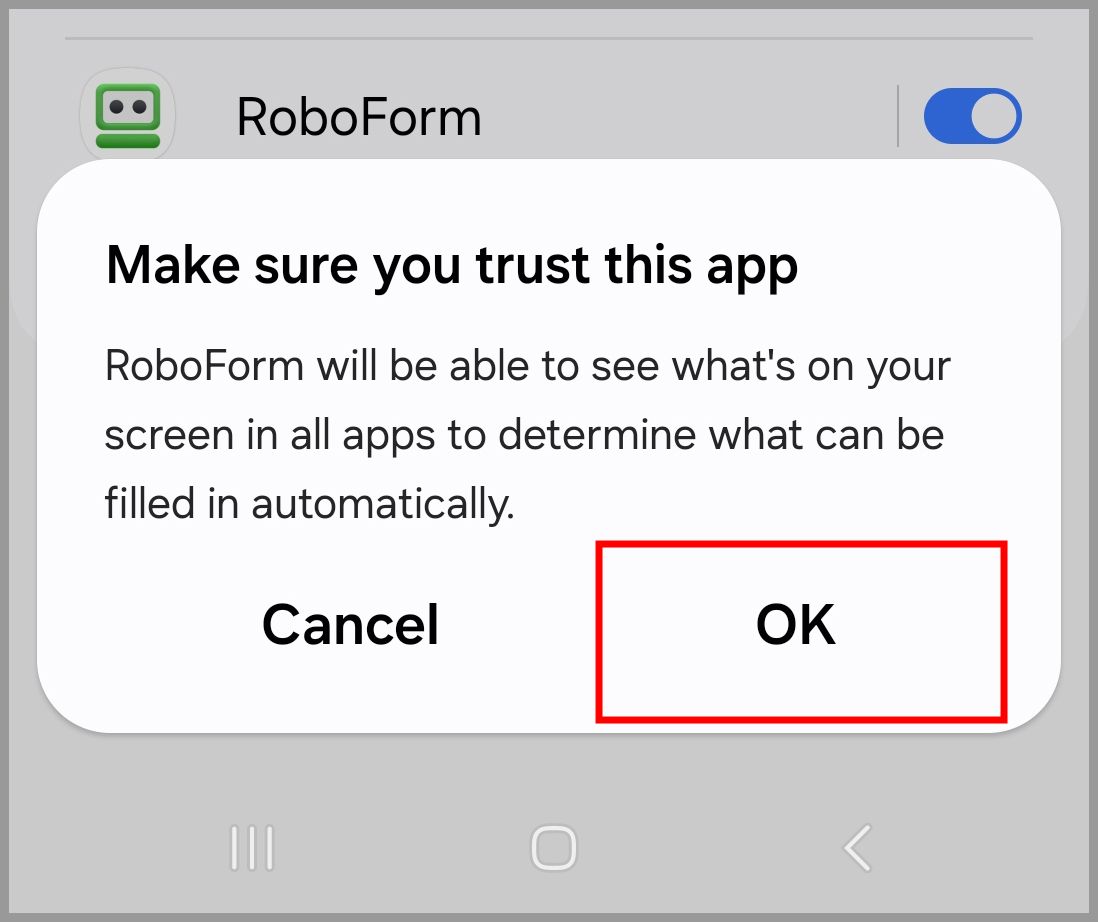
5) You will be prompted to confirm that you trust RoboForm, tap the "OK" button on this prompt.
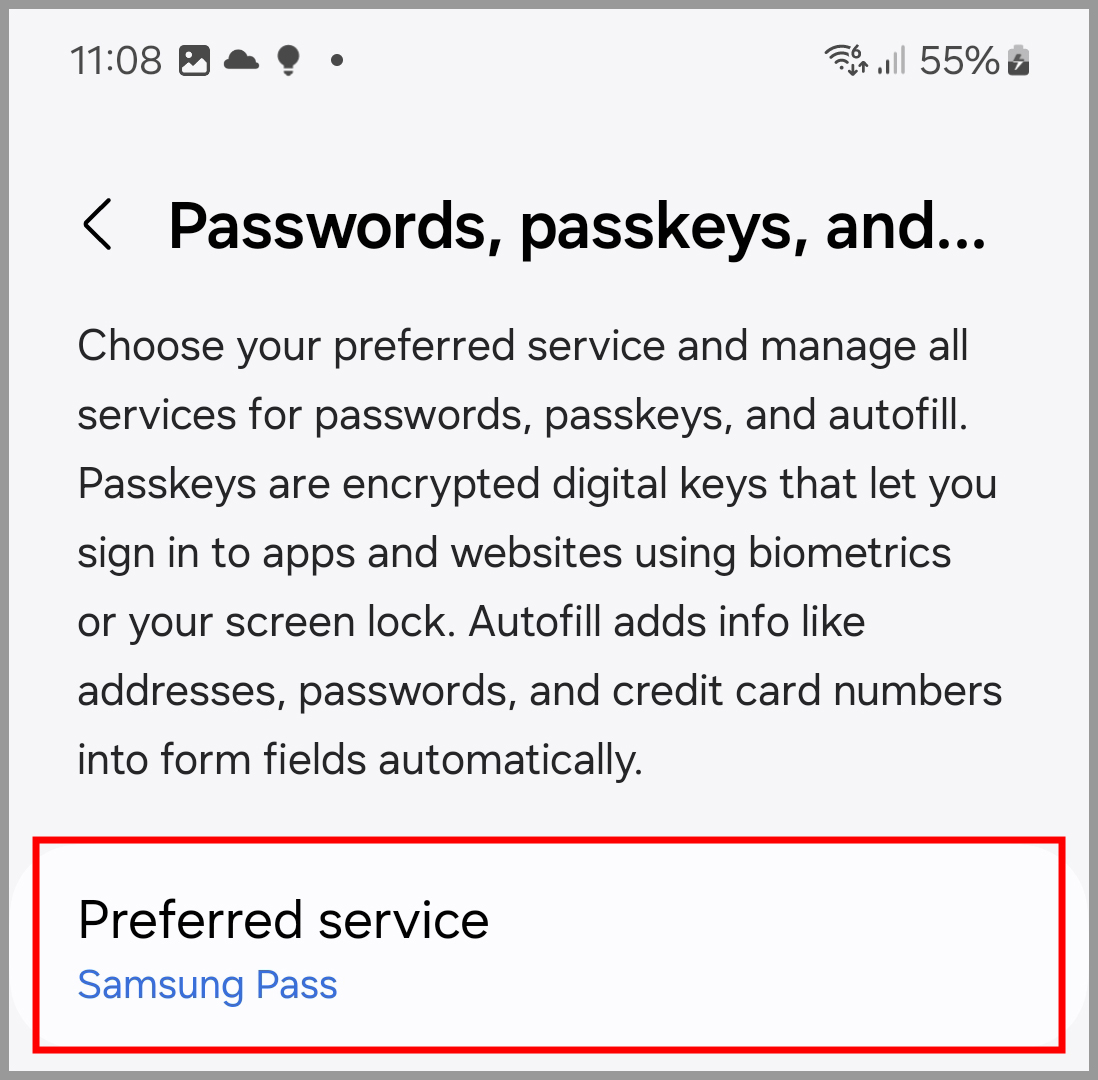
6) Next, tap the "Preferred service" option.
Enabling Accessibility Mode for RoboForm Auto-fill
1) Open the RoboForm app and tap the 3 dots in the upper right corner. Then, select "Settings" from the menu.
2) Select "Integration" from the Settings menu.
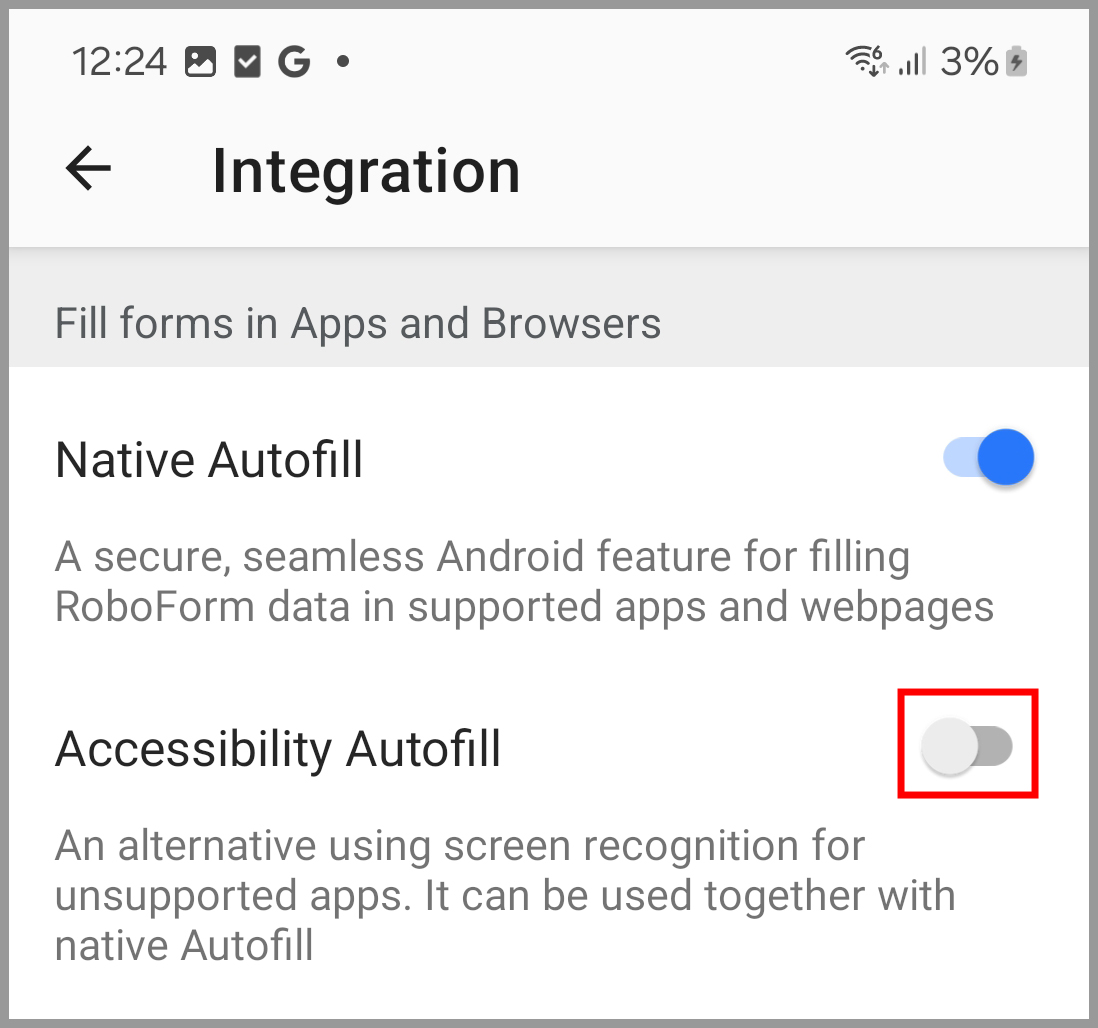
3) Tap the "Accessibility Autofill" option.
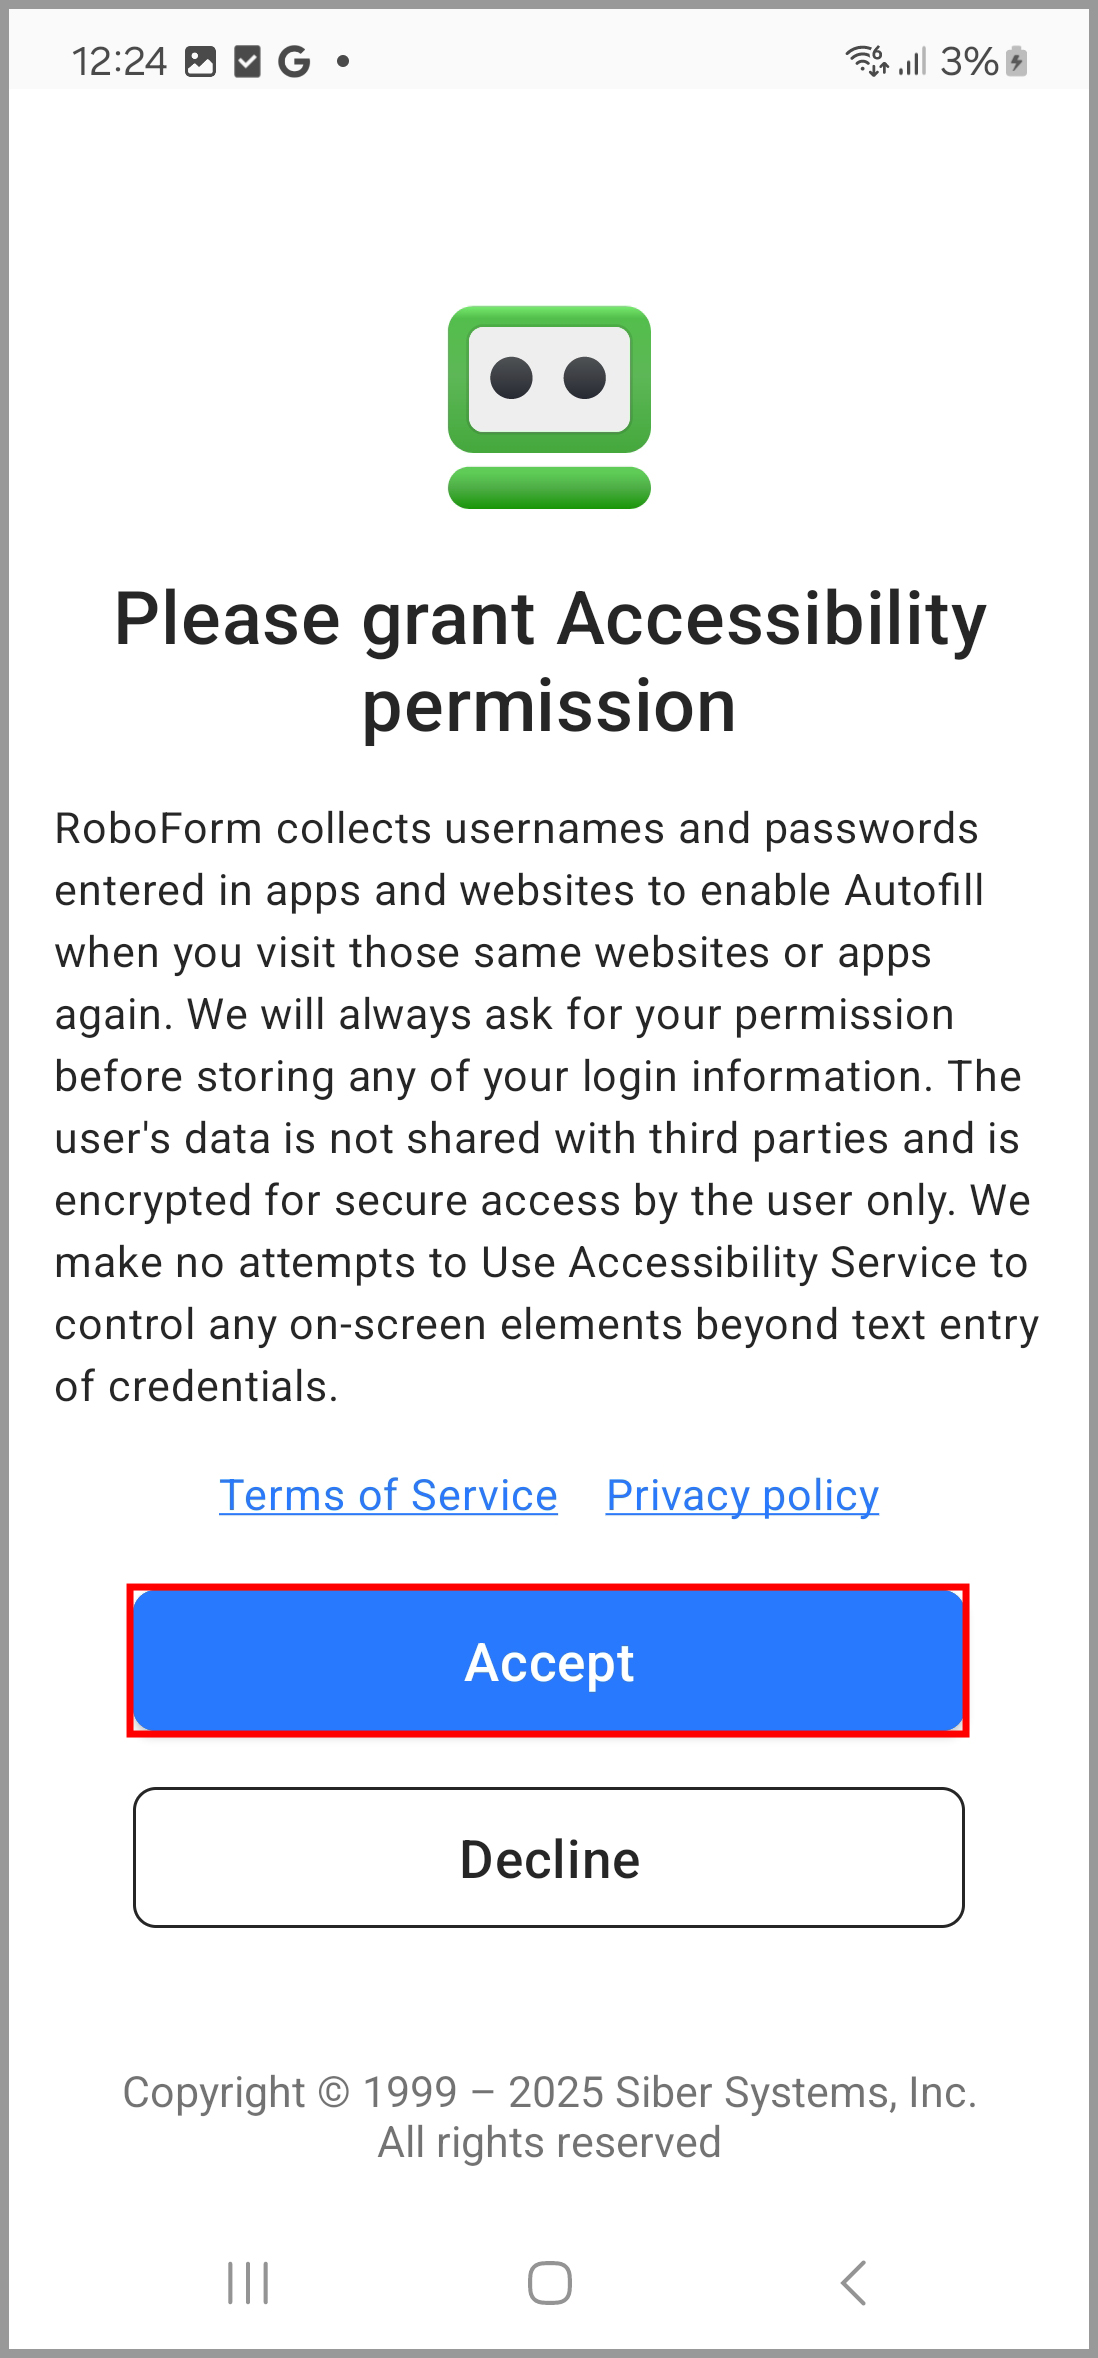
4) RoboForm will prompt you to grant Accessibility Permissions, tap the blue "Accept" button on this message.
5) Open your Android device’s Settings app and tap the “Apps” section. If your device opens the Accessibility tab instead, please proceed to step 9.

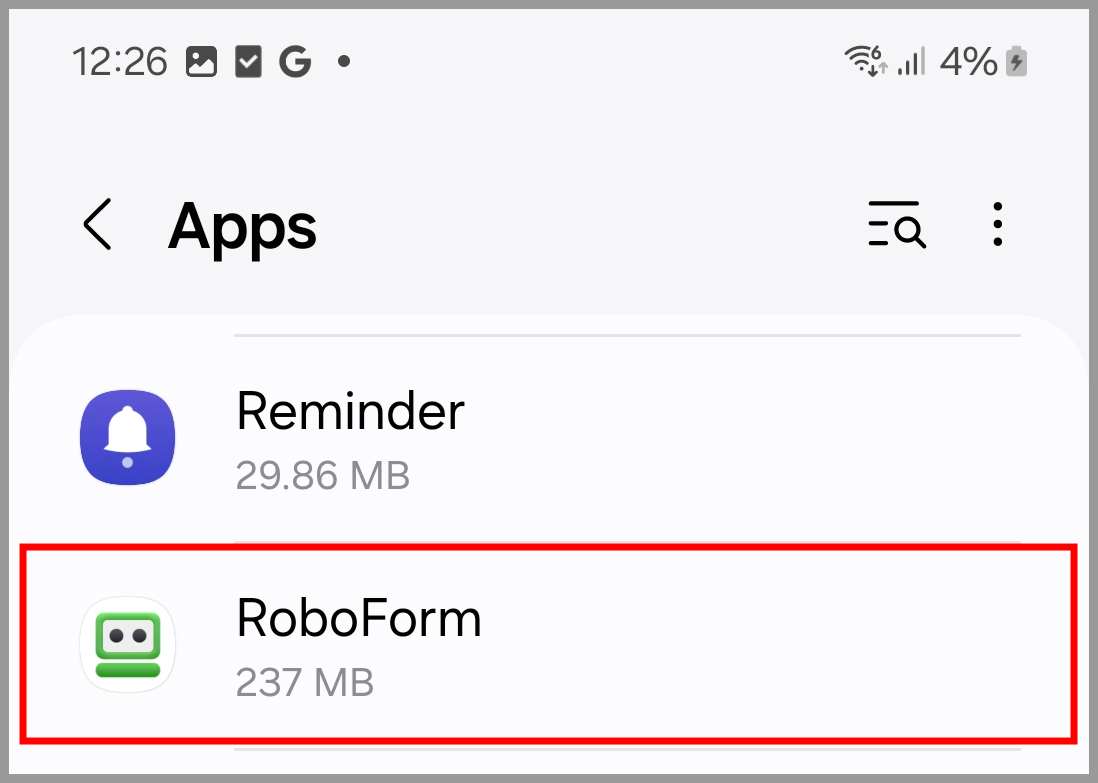
6) Select "RoboForm" from the list of apps.
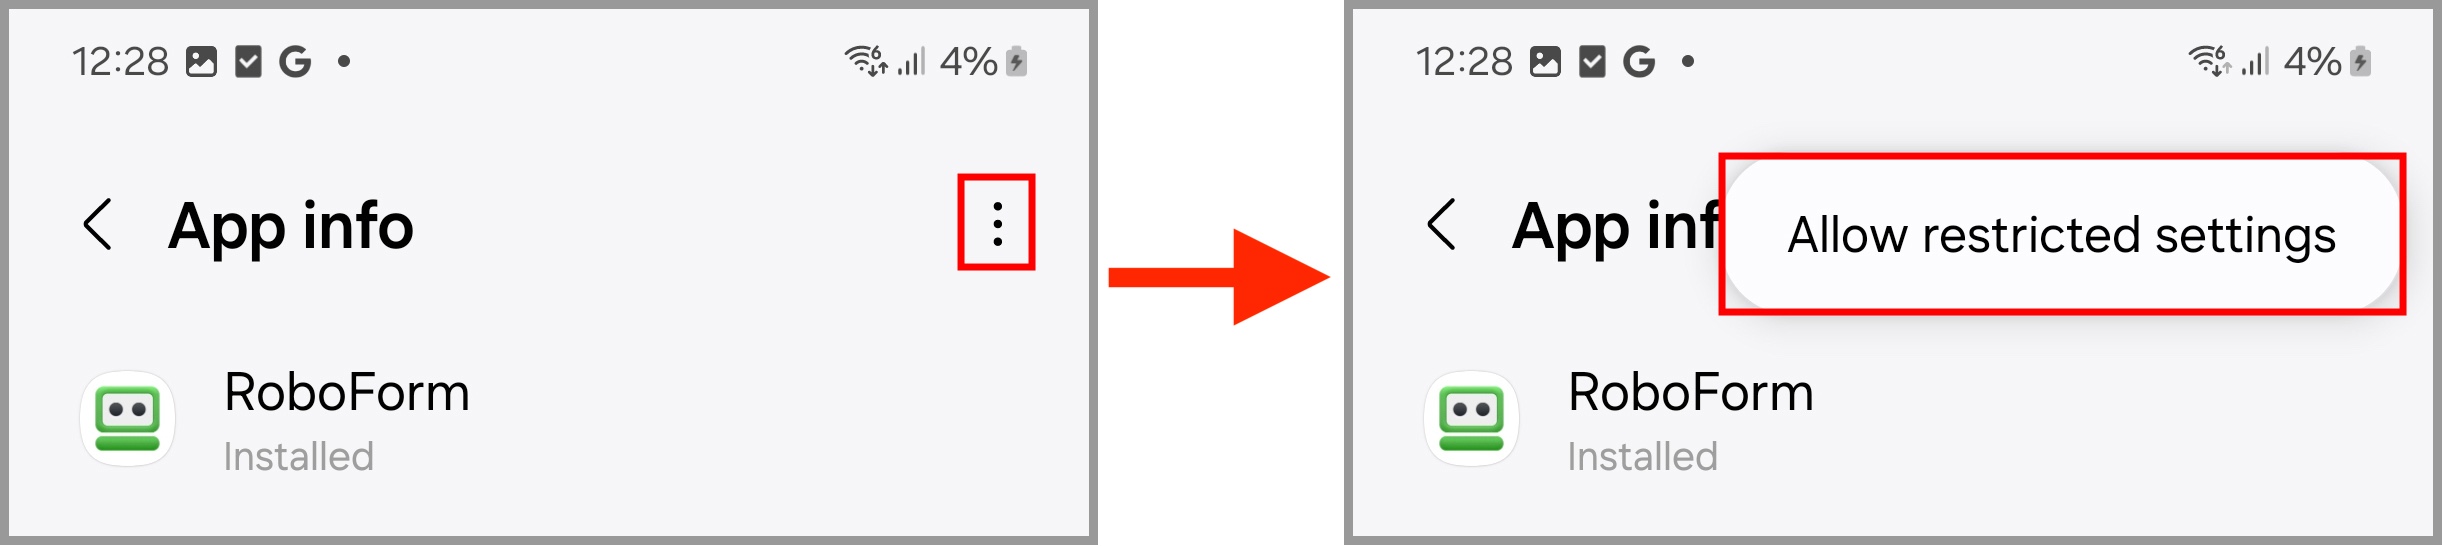
7) Tap the 3 dots in the upper right corner of the App Info page, and select the "Allow restricted settings" option.
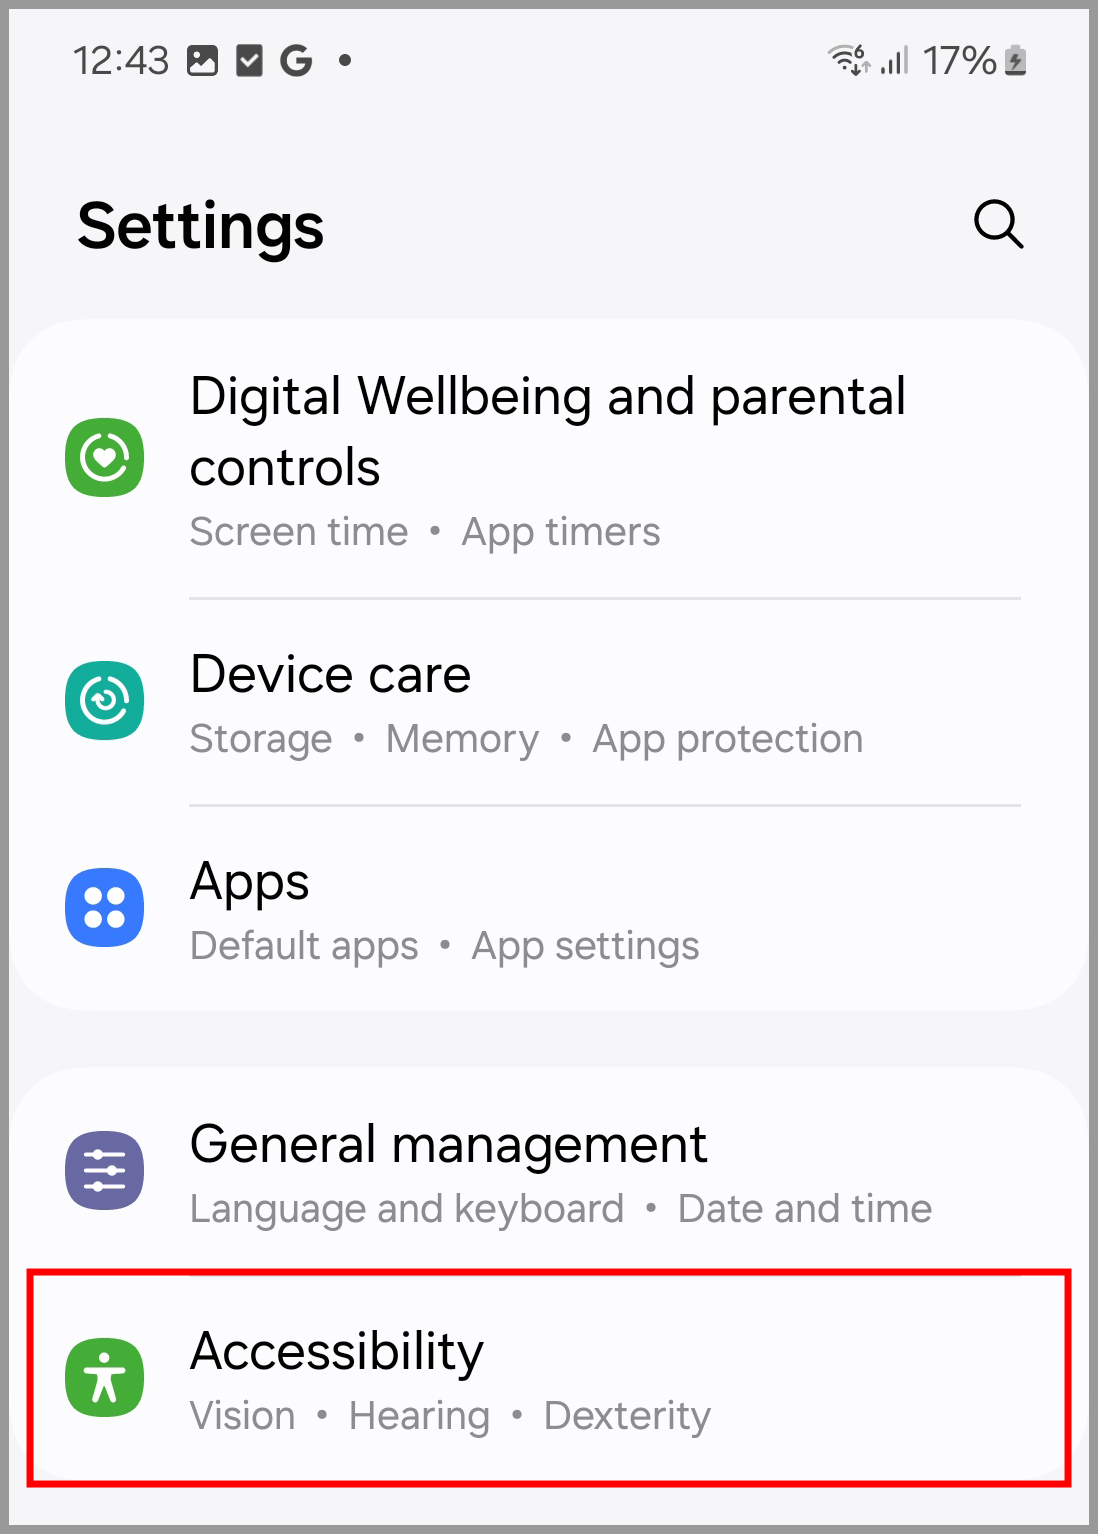
8) Return to the main page of the Android device's Settings app, and tap the "Accessibility" section.
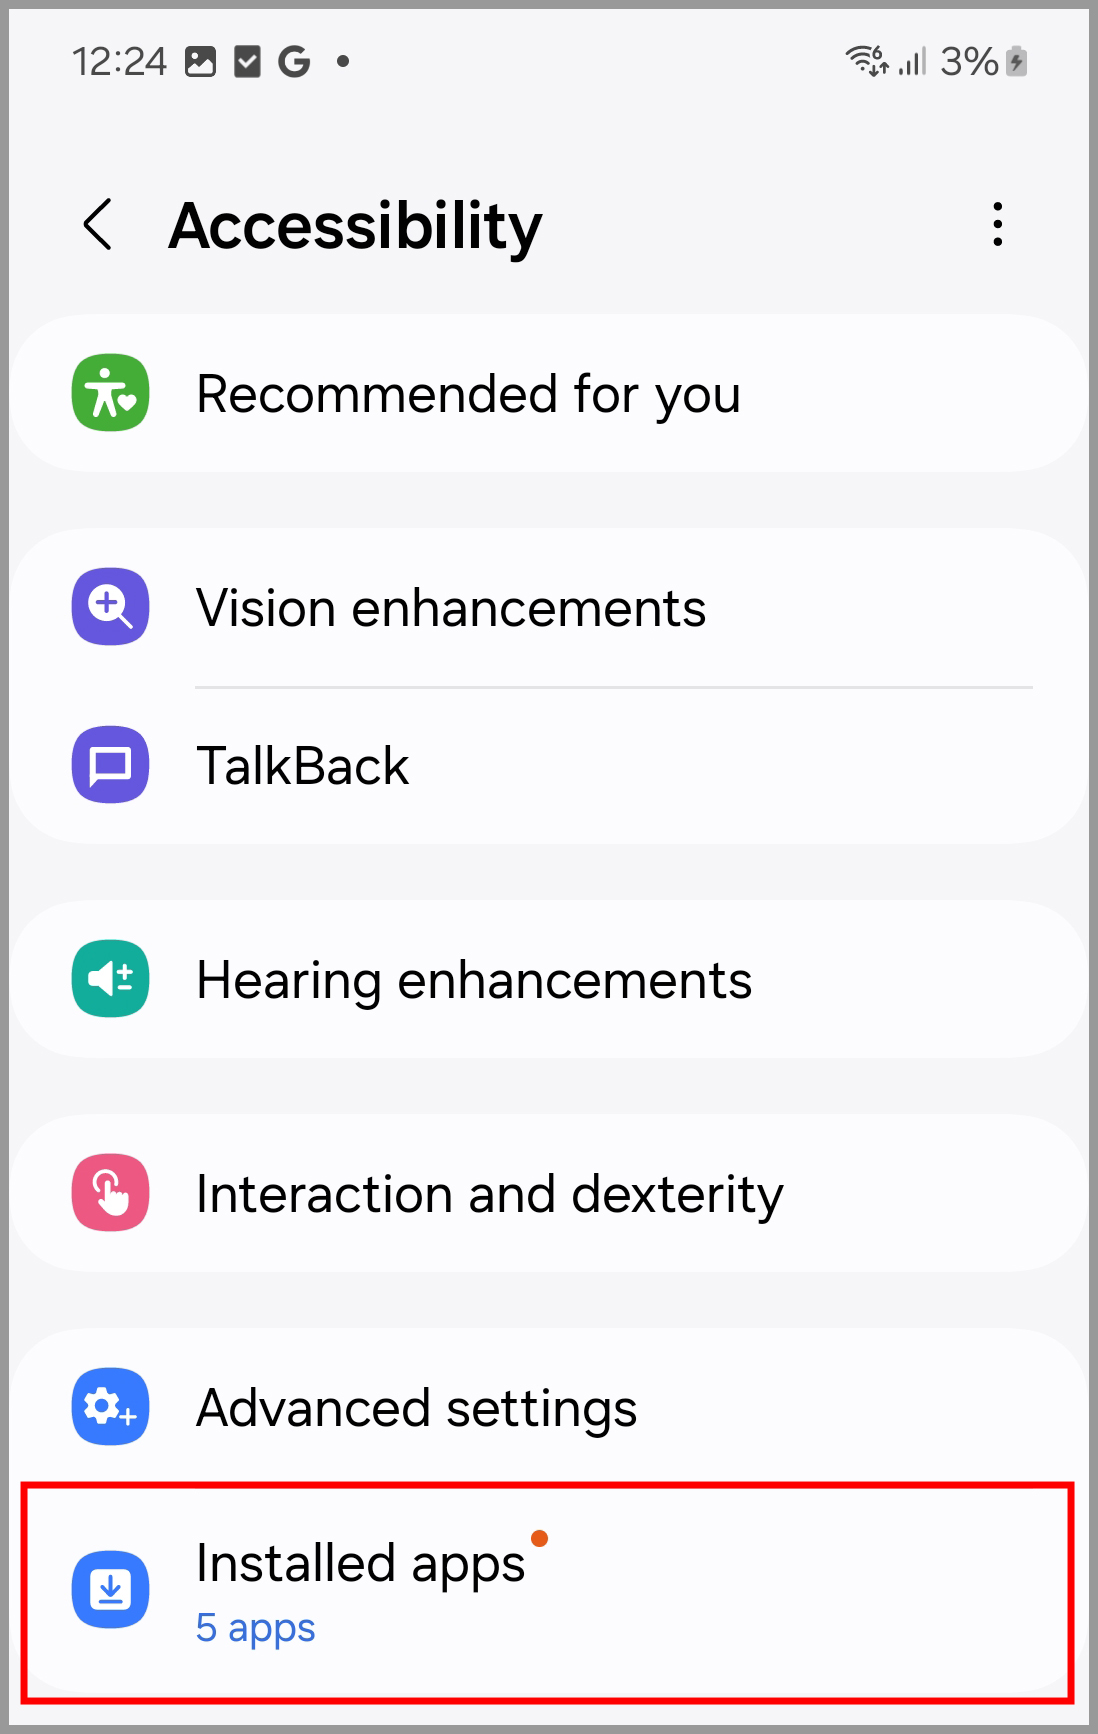
9) Select "Installed Apps" from the Accessibility menu.
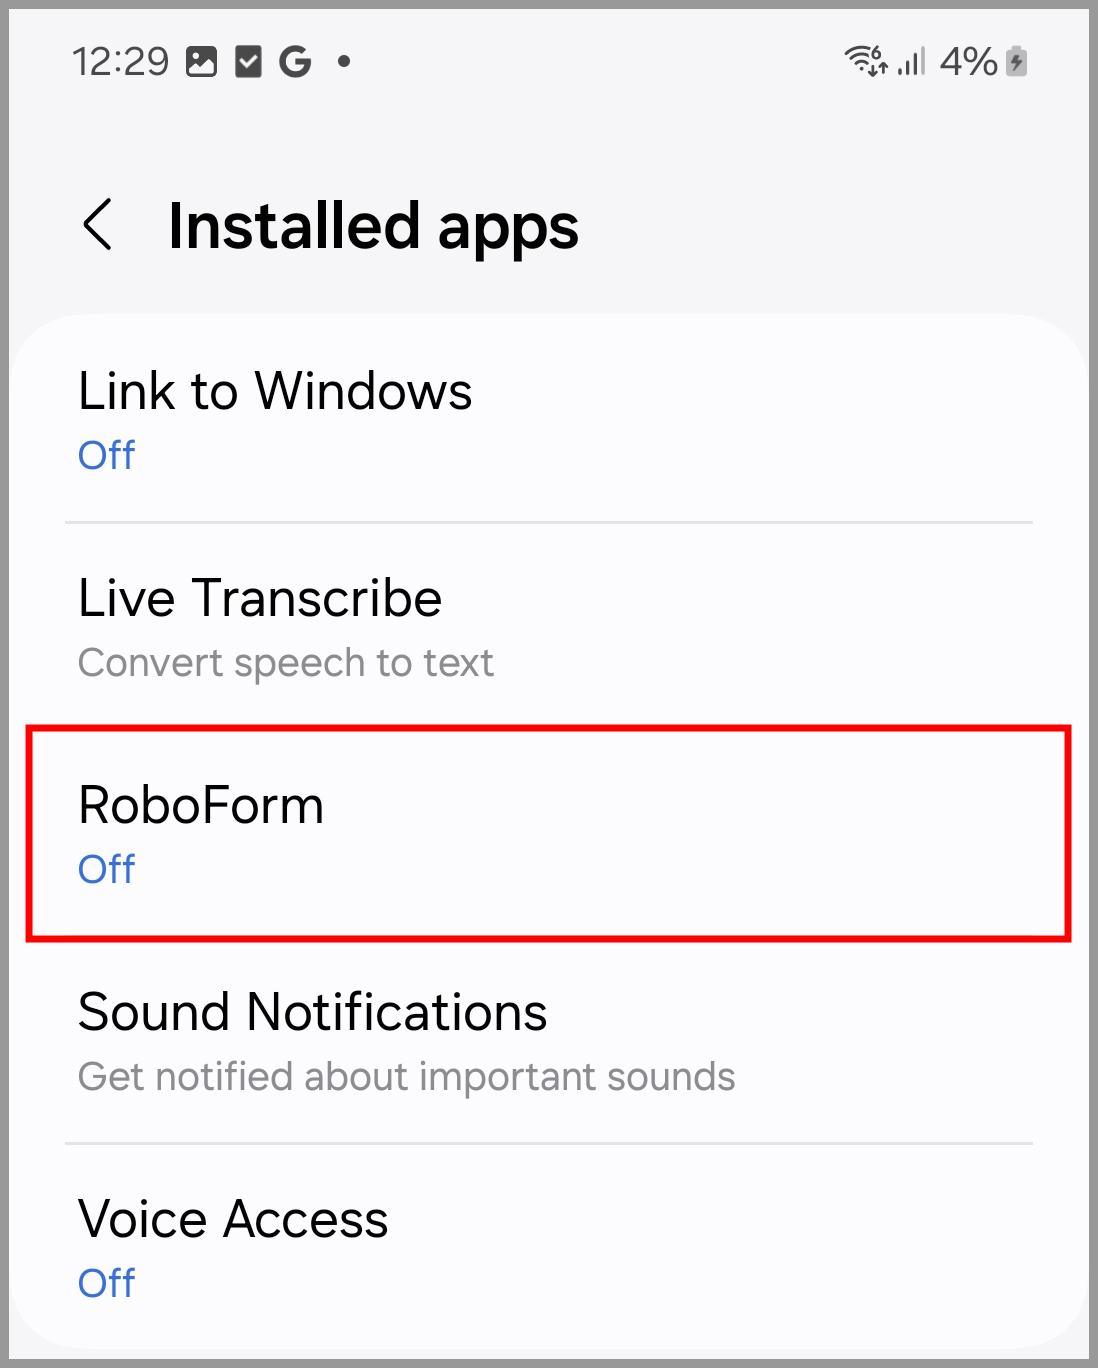
10) Tap the "RoboForm" option.
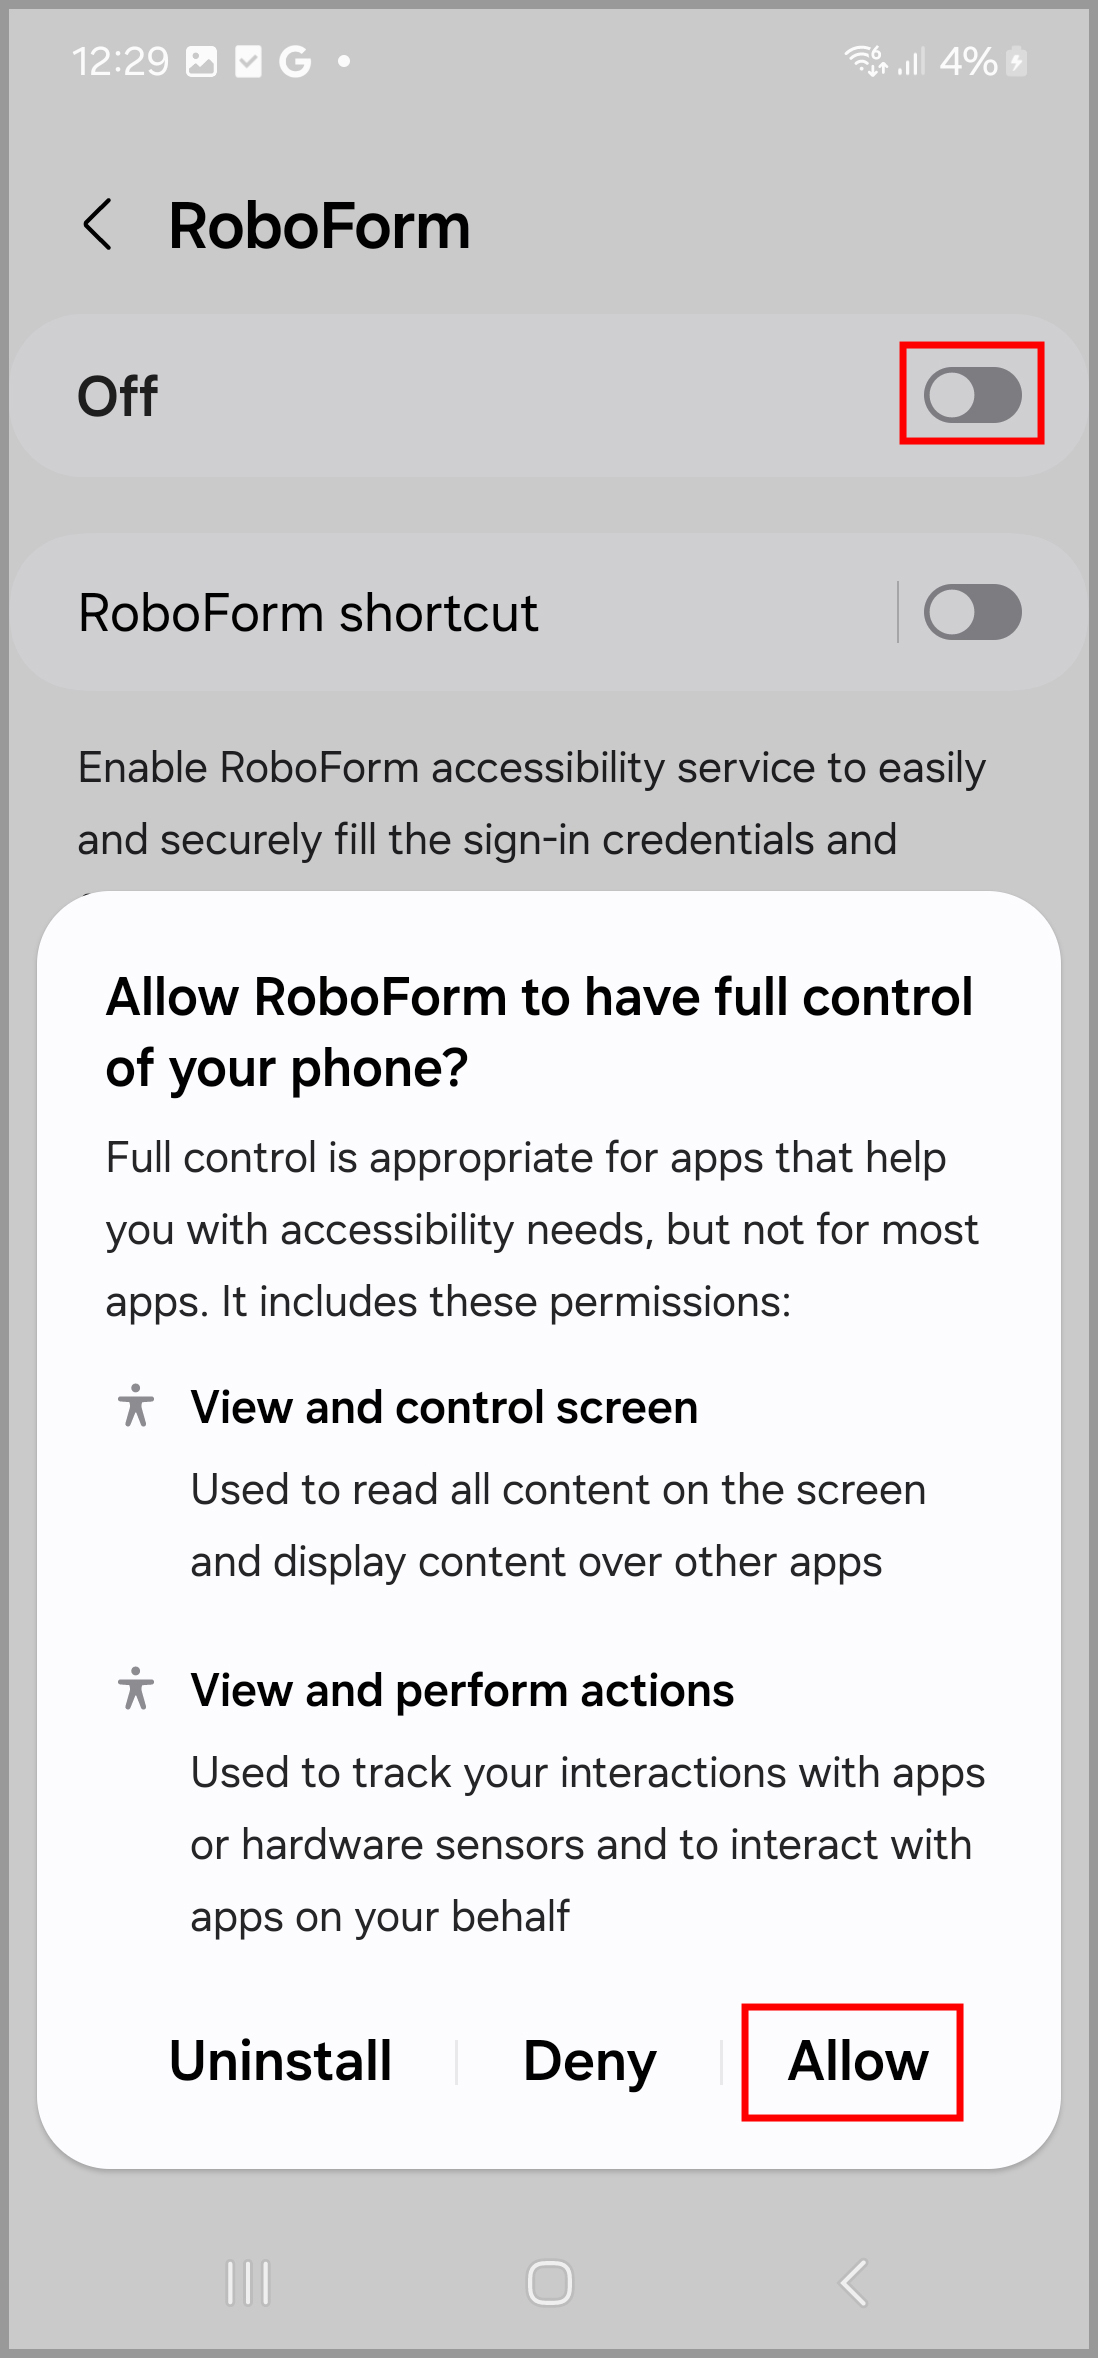
11) Tap the toggle at the top of the page to turn it to the ON position. You will be prompted to confirm this action, select "Allow" on the confirmation message.
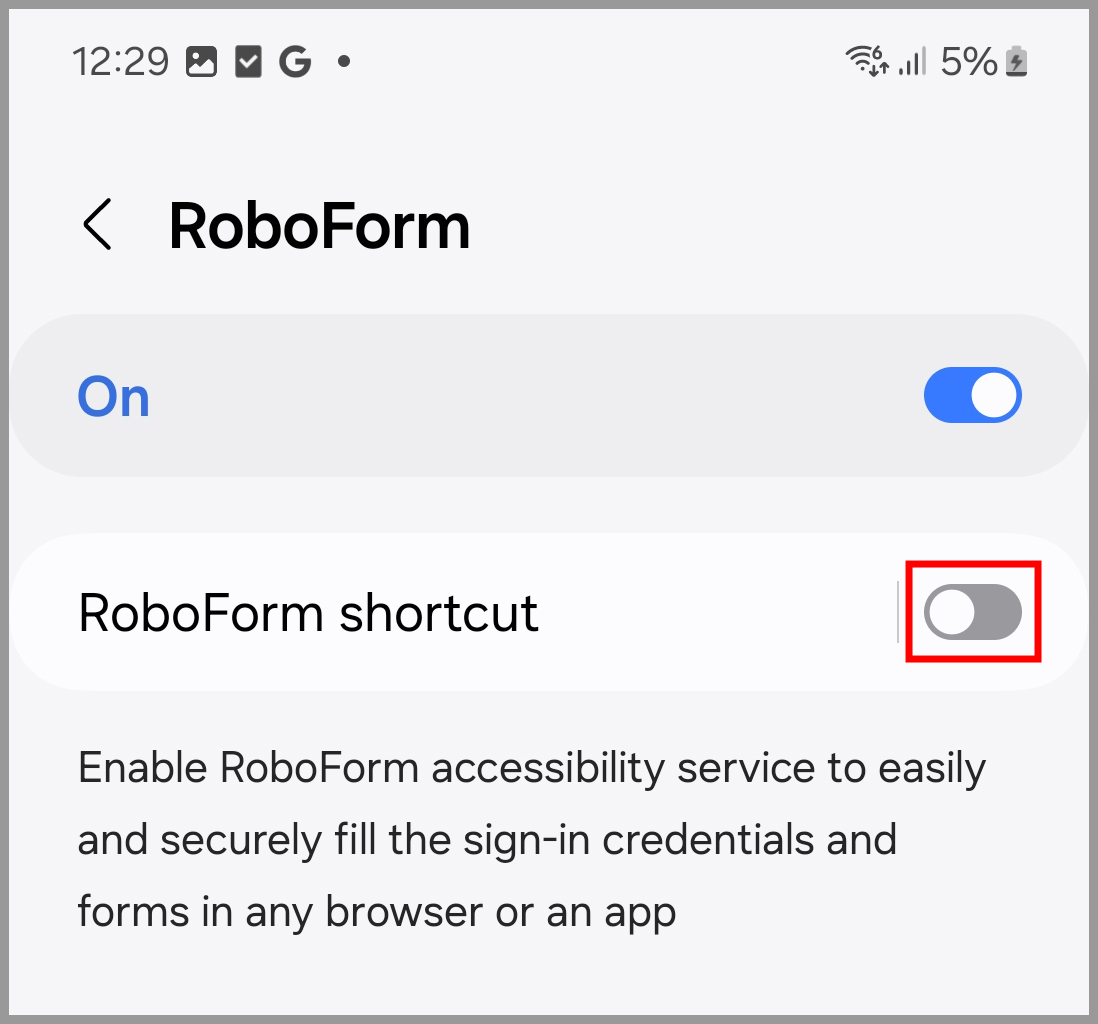
12) Tap the toggle to the right of the "RoboForm shortcut" option to turn it to the ON position.
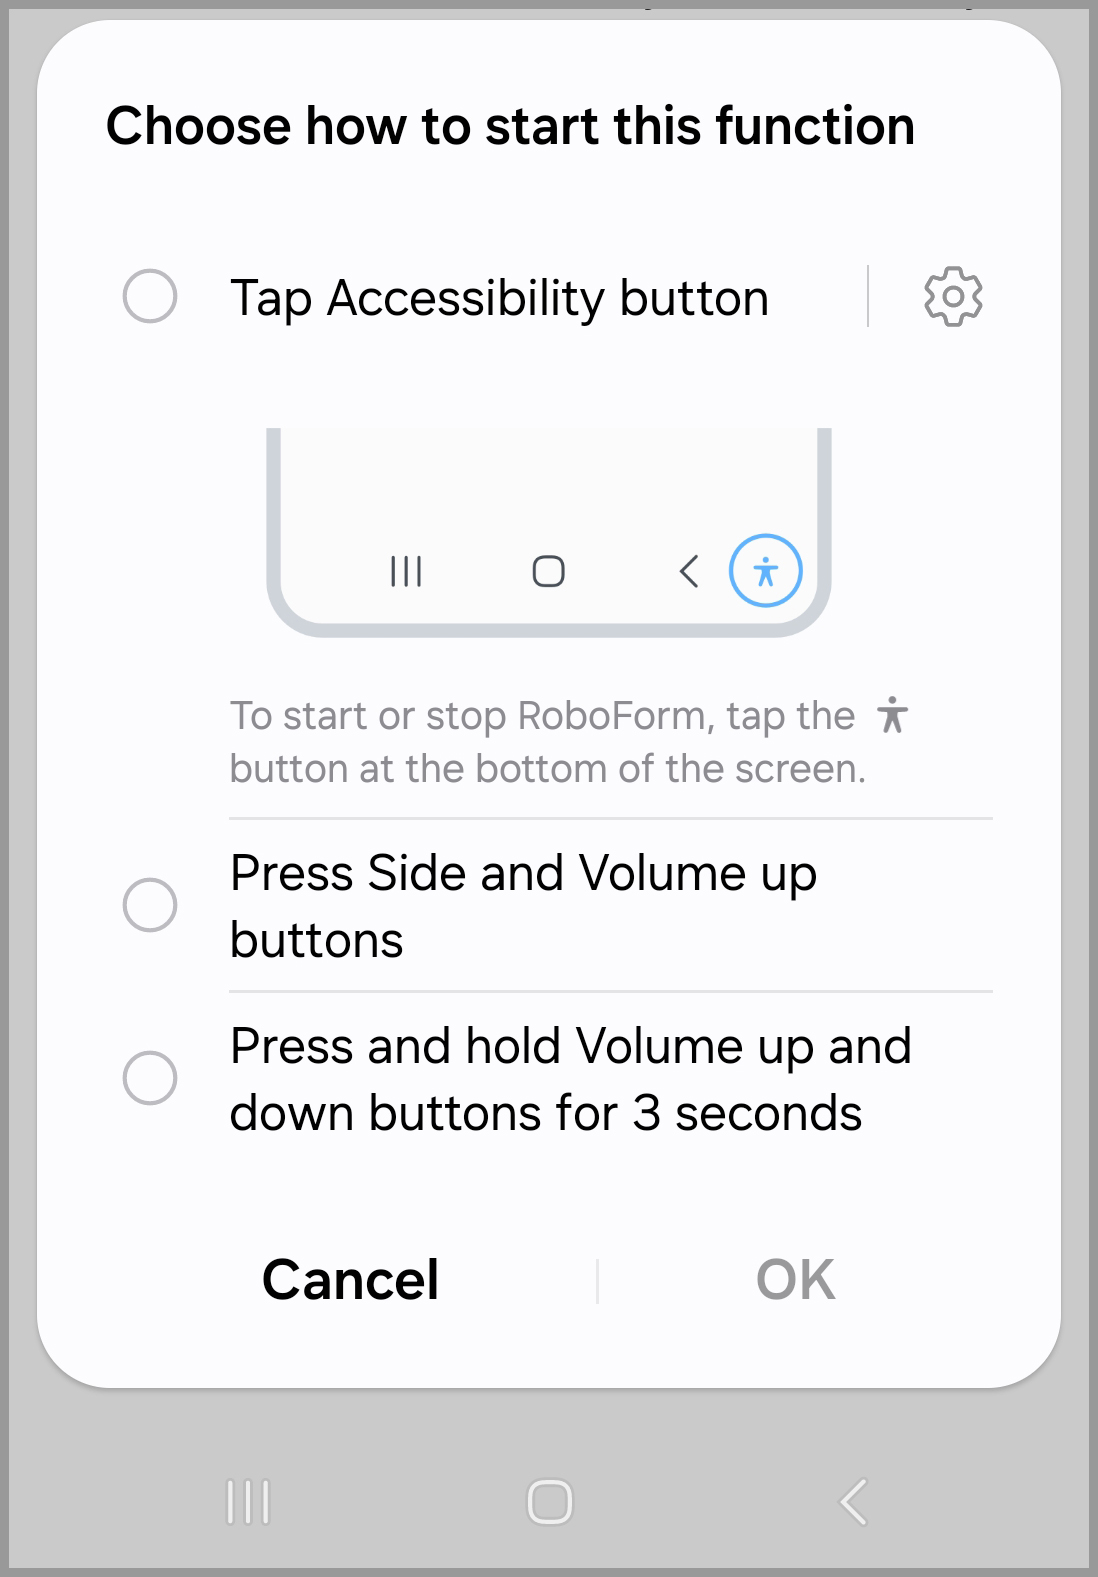
13) You will be presented with instructions for how to start this function.
14) Accessibility mode for RoboForm Auto-fill is now enabled.
Comments
0 comments
Article is closed for comments.